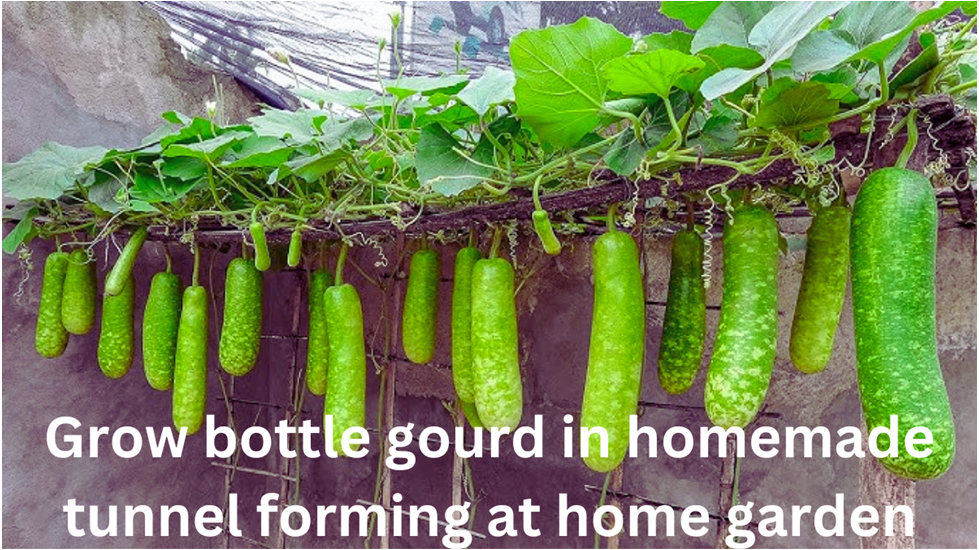
Home gardening offers a fulfilling and sustainable way to produce fresh, organic vegetables right in your garden. Bottle gourd, also known as calabash, is popular due to its versatility in cooking and nutritional benefits. Growing bottle gourd in a homemade tunnel can optimize growth conditions and extend the growing season, ensuring an overflowing harvest. This guide will explore the steps to successfully cultivate a bottle gourd in a tunnel in your home garden.
Creating a Homemade Tunnel
Before delving into the specifics of growing bottle gourd, it’s essential to set up a suitable environment for optimal growth. A homemade tunnel protects from harsh weather conditions and creates a microclimate favorable to plant growth. Here’s how to create one
1-Select a suitable location for Tunnel
Choose a spot in your garden that receives sufficient sunlight throughout the day. Make sure the area has well-drained soil and is away from any obstructions that may hinder the tunnel’s construction.
2-Gather materials
To create a homemade tunnel for your garden, gather PVC pipes or metal hoops for the frame. Obtain greenhouse plastic or row covers to provide protection. Secure the structure with anchoring materials like stakes or anchors. Additionally, collect fundamental tools such as a hammer and nails for assembly. Optional materials like clips or zip ties can help secure the covering material.
3-Construct the frame
Install the PVC pipes or metal hoops along the length of the garden bed, spacing them effectively to support the covering material. Secure them firmly into the ground to prevent shifting.
4-Cover the frame
Place the greenhouse plastic or row covers over the frame firmly. Pull it tight to cover the frame completely. Use clips or stakes to secure it in place on the ground.

Soil Preparation for Tunnel
Once the tunnel is in place, prepare the soil to create an optimal growing environment for bottle-gourd plants. Follow these steps
1-Soil amendment
Test the soil to review its pH and nutrient levels. Amend the soil as needed by incorporating organic matter such as compost or well-rotted manure to improve fertility and soil structure.
2-Raised beds
Consider constructing raised beds within the tunnel to further improve drainage and provide better root aeration. Fill the beds with a nutrient-rich potting mix or a mixture of garden soil and compost.

Planting Bottle Gourd in Tunnel
After the preparation of tunnel and soil, it’s time to plant bottle gourd seeds or seedlings. Follow these strategies for successful planting
1-Seed selection
Choose high-quality bottle gourd seeds from a reputable supplier or opt for healthy seedlings from a nursery. Select a variety suited to your climate and growing conditions.
2-Spacing and depth
Plant bottle gourd seeds or seedlings at a spacing of 18-24 inches apart, with rows spaced around 3-4 feet apart. Sow seeds at a depth of 1 inch in well-drained soil.
3-Watering and fertilizing
Keep the soil consistently moist but not waterlogged to promote germination and healthy growth. Apply a balanced fertilizer or organic compost every 2-3 weeks to provide essential nutrients.

Maintenance and Care of Tunnel
To ensure healthy growth and a bountiful harvest, proper maintenance and care are critical. Here are some important tasks to consider
1-Pruning and training
Train bottle gourd vines to climb vertically along the tunnel frame to maximize space utilization. Prune any excess foliage and side shoots to promote airflow and reduce the risk of diseases.

2-Pest and disease management
Monitor the plants regularly for signs of pests such as aphids, cucumber beetles, and powdery mildew. Implement cultural practices such as crop rotation and the use of organic pesticides to manage pest and disease pressure.

3-Harvesting
Bottle gourds are ready for harvest 60-80 days after planting, depending on the variety. Harvest them when the fruits reach the desired size and have a glossy appearance. Use a sharp knife or pruning shears to cut the fruits from the vine, leaving a short stem attached.


